Tuesday, April 13, 2010

Miss Thing gets a Makeover

What a difference a week makes and "Miss Thing" definitely had a good week!

After all of the comments came in here and from my guest post over at The Country Chic Cottage for What Would You Do With It Wednesday, the majority of you said that you would make Miss Thing into a bead or button sorter. There were some other really creative ideas too, but this one really intrigued me and was more what I had in mind when I bought her.

As a reminder, this is what Miss Thing looked like when I brought her home.


After sitting down with some paint and craft supplies, she began to take on a whole new look.

First, I applied a couple of coats of Heirloom White spray paint to the base. I didn't take photos of this process, but suffice it to say the base went from a light woodgrain to Heirloom White.  It was like magic, I tell ya!

I set that aside to dry and started to work on the individual vials.
 I tore out sixteen pages from a vintage French print book that I have. Now, I can hear you gasping, but don't freak out about me tearing up a vintage French print book.  It is a simple paperback called "Teach Yourself French", not a classic tale by any means!
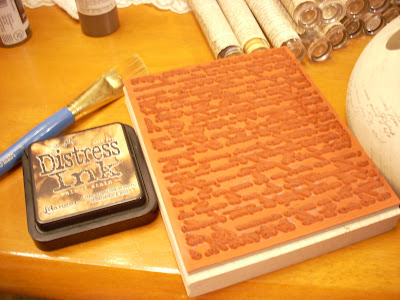
I used distressing ink on the pages to darken the torn edges, but they already have a great aged patina look to the pages because the book was printed in 1964. Yummy! 


Then I applied a line of glue along one edge of the page so that it would adhere to the vial.


Then I simply rolled them around the vial in various directions. Some wrapped directly around, some wrapped on an angle, because everyone loves a variety, right?

When finished, I sat them back in the base which was now dry.
Then I went diggin' in my bottomless stash of ephemera.  This is where the fun began!


One at a time, each vial took on a personality of their own as I added baubles and trinkets and ribbons, oh my!

Then I stood back and looked at the entire piece and the base just appeared to be way too stark white to go with the vintage look items that had been applied to the vials. I got out one of my all time favorite rubber stamps and randomly stamped the base with French Script words in all directions. 

Then, using my paint brush, I randomly dry brushed some ink smudges and smears around on the base to shabby it up a bit. Perfect!


Then I set about filling it with the vials. The following photos need no explaination, but they sure are pretty eye candy!


You likey? If so, it can be yours!  It's listed on Ebay this week and you can see even more photos of the rest of the piece by following this link to my Ebay listings.

I will be linking up this week to a bunch of fun party links too, be sure to check them out for more great home decor and craft ideas!

Trash to Treasure Tuesday at Reinvented
Market Yourself at Sumos Sweet Stuff
Motivate Me Monday at Keep it Simple
Just Something I Whipped Up at The Girl Creative
Toot Your Horn Tuesday at  A Silly Little Sparrow
Second Time Around at A Picture is Worth 1000 Words
Penny Pinching Party at The Thrifty Home
Show and Tell at Blue Cricket Design
Spotlight Yourself at It's so Very Cheri
Works for Me Wednesday at We are That Family
Look what I Made at Creations by Kara
Whatever Goes Wednesday at Someday Crafts
Show off your Stuff at Fireflies and Jellybeans
Thrifty Thursday at Tales from Bloggeritaville
Strut Your Stuff Thursday at Somewhat Simple
Transformation Thursday at The Shabby Chic Cottage
Under $100 at Beyond the Picket Fence
Get Your Craft on Thursday at Life as Lori
Show and Tell Friday at My Romantic Home
Inspired By at the Inspired Room
Feature Yourself Friday at Fingerprints on the Fridge
Frugalicious Friday at Finding Fabulous
Saturday Nite Special at Funky Junk Interiors
Metamorphoisis Monday at BNOTP

Til next time!
Lisa


Tuesday, April 6, 2010

Me and Miss Thing

Hi Everyone!

I have some exciting news!  Wednesday, I am going to be the feature on this week's What Would You Do With It Wednesday, over at The Country Chic Cottage!  I was totally excited! First, because it is my first feature, EVER!!! Second, because I have the perfect piece to ask "What would YOU do with it???"

I was shopping at a local Goodwill a while back and was coming across all kinds of goodies that were catching my eye and jumping into my cart. I was having a wonderful day with what I like to call My Little Pretties.  I rounded a corner and suddenly saw this strange thing sitting there on the shelf looking back at me.


I managed to get out of the store that day with out her, but a few weeks later, I went back to the Goodwill (What can I say? I am a chronic junker and thrift store addict) and the first thing I saw when I walked in, there on the shelves of doom sat this strange little thing, staring at me, almost daring me to buy her. I hadn't given her a second thought, but when I saw her sitting there staring at me again, what was I to do? I had visions of a science project gone wrong, the base kinda reminded me of a mushroom, but I was totally intrigued by her.

I walked over to the shelves of doom and went to pick her up, when I noticed she spun. Oh even better! A spinning mushroom science lab!  The entire base sits on a lazy susan of sorts. For some reason, the fact that she spun intrigued me and I just knew I could do something really fun with her. But what? Never one to back down from a challenge, I said "Okay Miss Thing, you are coming home with me." She has been affectionately known as Miss Thing ever since. And for the price, I figured I couldn't go wrong.  The tag read $1.50, but it was 50% off day, so I got her for 75 cents.


So, now she had a home, but I had no idea why.  I still don't.  That is why I am so thrilled to be here today asking all you lovely readers "What would you do with it?" So bring on your witty comments, oh crafty readers of blogland! I can't wait to be inspired by you all! Just leave a comment below or head over to Angie's blog to leave a comment there. Then tune in next Wednesday where I will be showing off what Miss Thing ultimately becomes.  I am sure she will be something just fabulous!

Til next time!
Lisa

Thursday, March 25, 2010

Everything's Coming Up Roses

A couple of weeks ago while reading Living With Lindsay, one of the blogs I follow, I was intrigued by an event that she was hosting.


The event, The $5 Challenge, is a challenge to shop for the supplies to make a spring decor item while spending less than $5 total for the item.  I like spring, I like home decor projects, heck, I even had five bucks. Always up for a challenge, I decided to give it a whirl. 

Well, naturally, when I think spring, I think flowers. When I think $5 or less, I think dollar stores.  When I think dollar stores, I think of my favorite, The Dollar Tree.  So off I went, with my $5 in hand to see what kind of trouble I could stir up.

I went up and down the aisles, pondering possibilities, picking stuff up, putting stuff back.  I started out with this little guy in my hand.


I then found this fun bag and thought okay, Easter theme.


I just wasn't feeling it.  Then I rounded a corner and inspiration struck me when I saw the most beautiful roses, blooming right there on the end of the Dollar Tree aisle. 

 I picked out my $5 worth of items and headed for the checkout.  Oh, the Easter bag and the little clown dude managed to come home with me too.  More about them later.

For the record, I love the shabby cottage look.  Shabby cottage with roses, even better! So, it came as no suprise that when I sat down to work on this challenge, I was having no trouble whatsoever getting into my project.  This time, I think the project may have also been getting into me.  Into my hair, under my nails, on my clothes... yeah, things were happenin' ...


But in the end, it was oh, so worth it!


I ended up with a Shabby French Bulletin Board, a Trinket Box, and six notecards made from a gift bag and paper I had on hand. I  then paired them with the three file folders and a set of sticky notes I had purchased, that didn't end up being part of my projects, just matching accessories that make for one stinkin' cute shabby chic desk set, right?


But wait, there's more!
 (I always did want to be my own info-mercial)
Part of the challenge was to provide a tutorial on the projects that I did.  So... without further adieu, let's get our craft on!


I started out with paint.  Two coats of off white acrylic paint on the trinket box and the frame of the bulletin board.


The trinket box took a little longer to dry, so I set it aside and started on the bulletin board.  Using a small dot of glue in the corner, I started to glue down the beaded trim in a diamond pattern. 


Where the trim crosses itself, I added a small dot of glue to hold it in place. It wasn't rocket science, I just criss crossed the trim to make diamonds and cut it off where it reached the edge of the frame.  I noticed that the cork was flexible enough to lift it up a tad so I cut it a bit longer than needed and tucked the edge under the frame for a nice finished look.

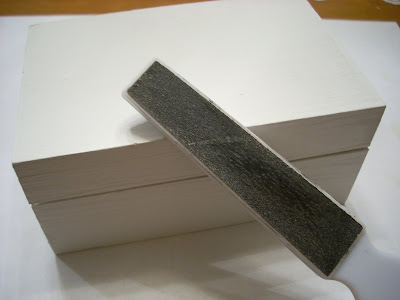
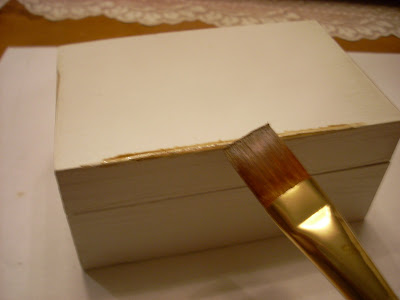
Then, cause it ain't shabby unless it's chipped, I took my handy dandy nail file to the edges and chipped em' up good and shabby.


The end result:


So I set the board aside and tackled the trinket box.  I gave it the same treatment with the nail file on the edges of the box.

 I noticed that the wood was really light in comparison with the bulletin board and wanted to make the set match, so I went and got some wood stain that I had left over from another project.  Yeah, I never said I wasn't a messy crafter.  Don't judge.


 I dabbed some on the raw wood to darken it a bit. 


Let it set for about thirty seconds to soak up that Golden Oak goodness (???) 


Then I wiped it off with a paper towel.  Worked like I planned it that way. Next, I had to focus on the inside of the box.  I cut two pieces of the gift bag to fit inside the lid and bottom of the box.


Using Mod Podge, I glued them in place.


I wanted to make the box lid functional as well, so I added a piece of the trim to it and glued both ends in place but left the middle part unglued so that stamps or small mementos can be tucked in behind it. Neat huh?


Then I decided that it needed something extra.  Oh, who am I kidding?  One of the dang beads fell off and I had to think fast.  I raided my button stash and glued on a cool button to make it look like it was part of the plan all along.  Cause I am good at thinking under pressure and stuff. Uhem...


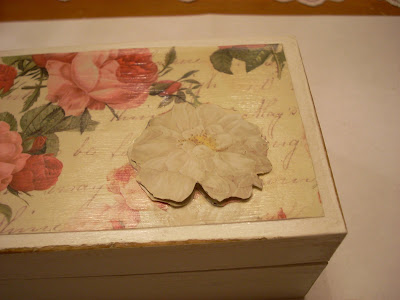
Next I started to work on the outside of the box.  First, I added another piece of the bag to the top of the lid.


I coated the lid with Mod Podge, set the paper in place, then did another layer of Mod Podge on top to seal it.  This helps make the outside stand up to handling and easy to dust. Not that I dust, but one could if one were so inclined...


It dries clear and to a matte finish.  Suddenly this tutorial is a lot like watching paint dry, right? Huh. While the Mod Podge was drying, I cut out three flowers from the bag and made these springy doo-dads.


You might be wondering what a springy doo-dad is for.  Or you might not.  Either way, I'm gonna tell ya.  Just hold yer horses and don't get ahead of me.  I took the first of the cut out flowers and glued it to the lid of the box.


Then, the other two get what I can only describe as the knuckle treatment.  I put the flower in my hand face down and rubbed it with my knuckle to round the paper. This gives them a curve and when you glue them onto the box they will pop up and be all nice and dimensional for you. Here is the process in pictures.


Okay, now for the springy doo-dad.  I bet the suspense was killing you, right?

I fan folded a strip of paper and added glue to one side of it.


Squish it back together so the folds get glued into a small block.


Yeah, it's messy, but what fun is crafting if you don't get messy? Notice the paint on my thumb.


This little springy doo-dad will give the flower added dimension and support as you build your flower pop up on the box.  And for those of you out there screaming "Doesn't she know about those foam dots?" First of all, stop screaming, it's rude. And second, yes, I know about them, but this was a $5 budget and I didn't want to add to my costs.  Geesh!


I added a bit more glue, squished the flower to the doo-dad, then glued the entire thing on top of the first flower which was now dried on the box lid.


I then cut out three random leaf shapes from the bag, gave them the knuckle treatment and added them to the lid by gluing them under the layers of flower petals.


Now for the big finish.  I laid out a line of glue all around the box and glued on more of the beaded trim to finish off the lid.  One problem, right smack dab in the front of the lid, the trim had a flaw in it.  Back to my button stash and presto change-o, another button saved the day.


Now what good would a bulletin board be without some cute little matching custom made push pins? That's what I thought too! Back to the button tin (thank you Grandma, your button tin is a treasure trove of vintage buttony goodness!) and a fun selection of buttons to work with. 


Flat backed ones work best, but I had one that had a loop on the back. 


 I used a pair of wire cutters to cut off the plastic loop and made it as flat as I could.


Then I applied a dot of glue onto each push pin and added the buttons.


These got added to the bulletin board for a fun, finished and totally coordinated look.


So then I set about cutting up the rest of the gift bag into pieces to layer onto cardstock to make cards to go with the desk set.  They are shown below with the finished items. 


So there you have it, my first $5 challenge.  All total I only spent $3.50 on the Dollar Tree items, as I had half the gift bag left over, so I am waaaaaay under budget here, folks.  That never happens!  Here's another peek at the entire desk set, all blinged out with her accessories. 


Not too shabby, huh?  Sorry, couldn't help myself.

I'll be linking up to some of my favorite parties through out the week:

Funky Junk Interior's Saturday Night Special
My Romantic Home's Show and Tell
Between Naps on the Porch for Metamorphosis Monday


So let me know what you think with some bloggy comment love. 

Til next time,
Lisa


Related Posts with Thumbnails